Like for many others, my first contact to computers was related to playing computer games. I still like to play computer games from time to time - but the purchase of a real gaming computer seems to be overkill for playing 10 to 20 hours a year.
Using cloud technologies in day-to-day business, the obvious solution is to create a virtual machine (VM) hosted in the cloud. This VM can then be used as a remote desktop, which runs the games you would like to play. I had no worries related to RAM or CPU, but I was a bit sceptic with regard to latency. After some research I was convinced, that there is good chance that it will work and tried it out.
This blog post is intended as documentation of the setup. Feel free to adopt it for your gaming needs. I will use Microsoft Azure as the public cloud provider. Basic knowledge about Microsoft Azure is necessary, because the explanation is mainly focussed on the pitfalls I came across.
As additional prerequisites you need to have a Microsoft Azure account as well as an eligible Microsoft Windows 10 license for use in the VM. If you don’t have an account yet, you can easily create one on the Microsoft Azure website.
Create The Virtual Machine
For easy deletion and cost analysis, I recommend creating a dedicated resource group for all gaming related resources.
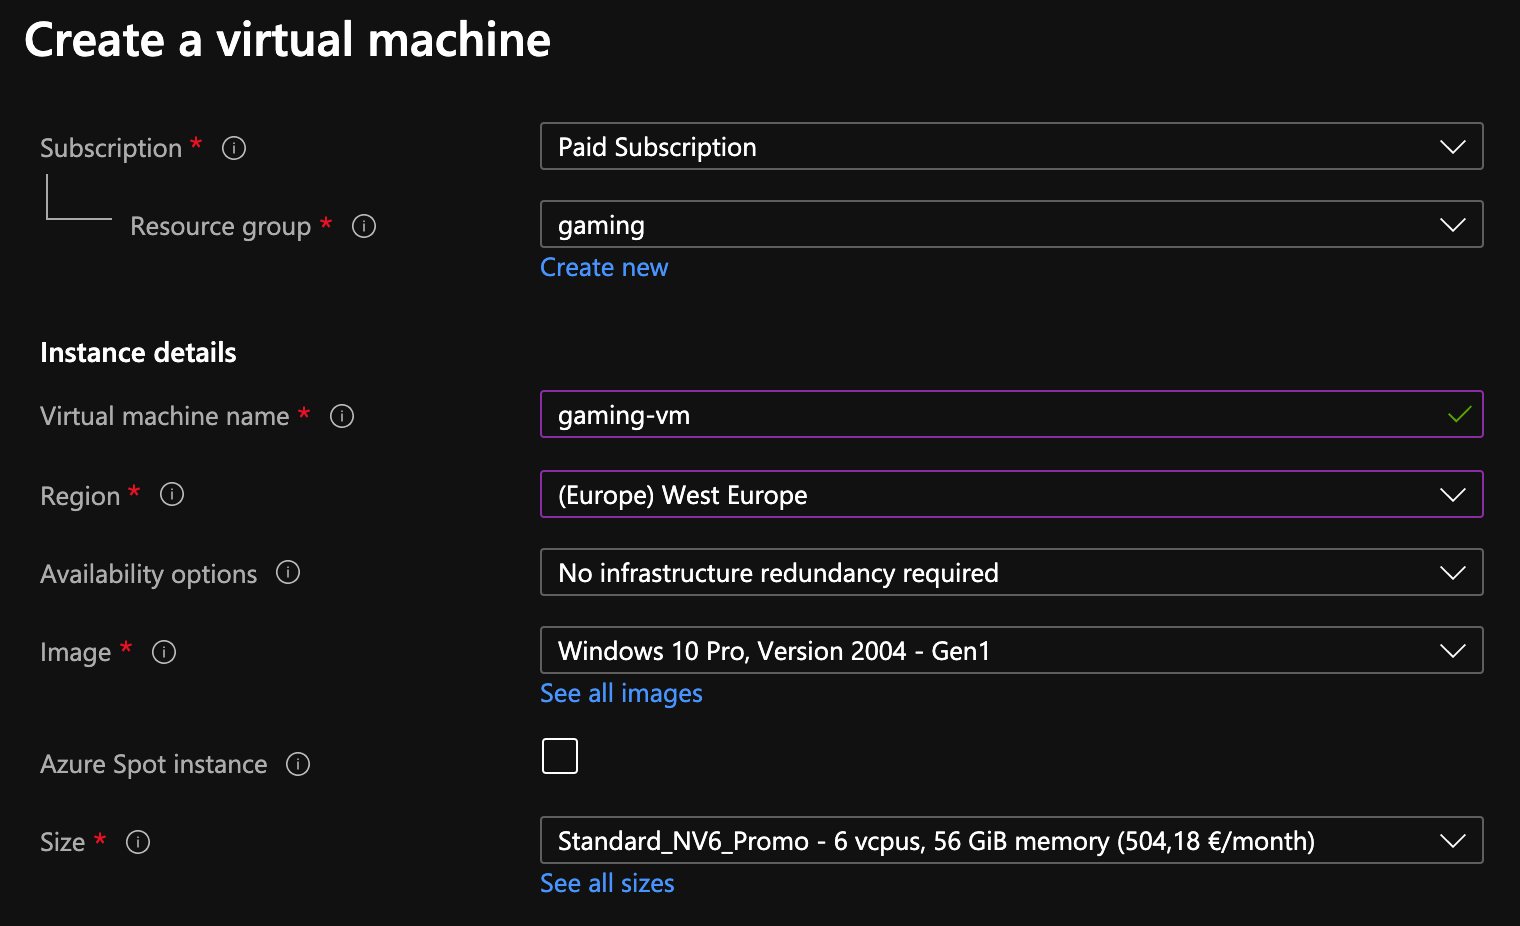
In my case I created a resource group called gaming.
The main part is to create a new virtual machine in the previously created resource group.
Make sure to pick the desired region and select the Windows 10 Pro image.
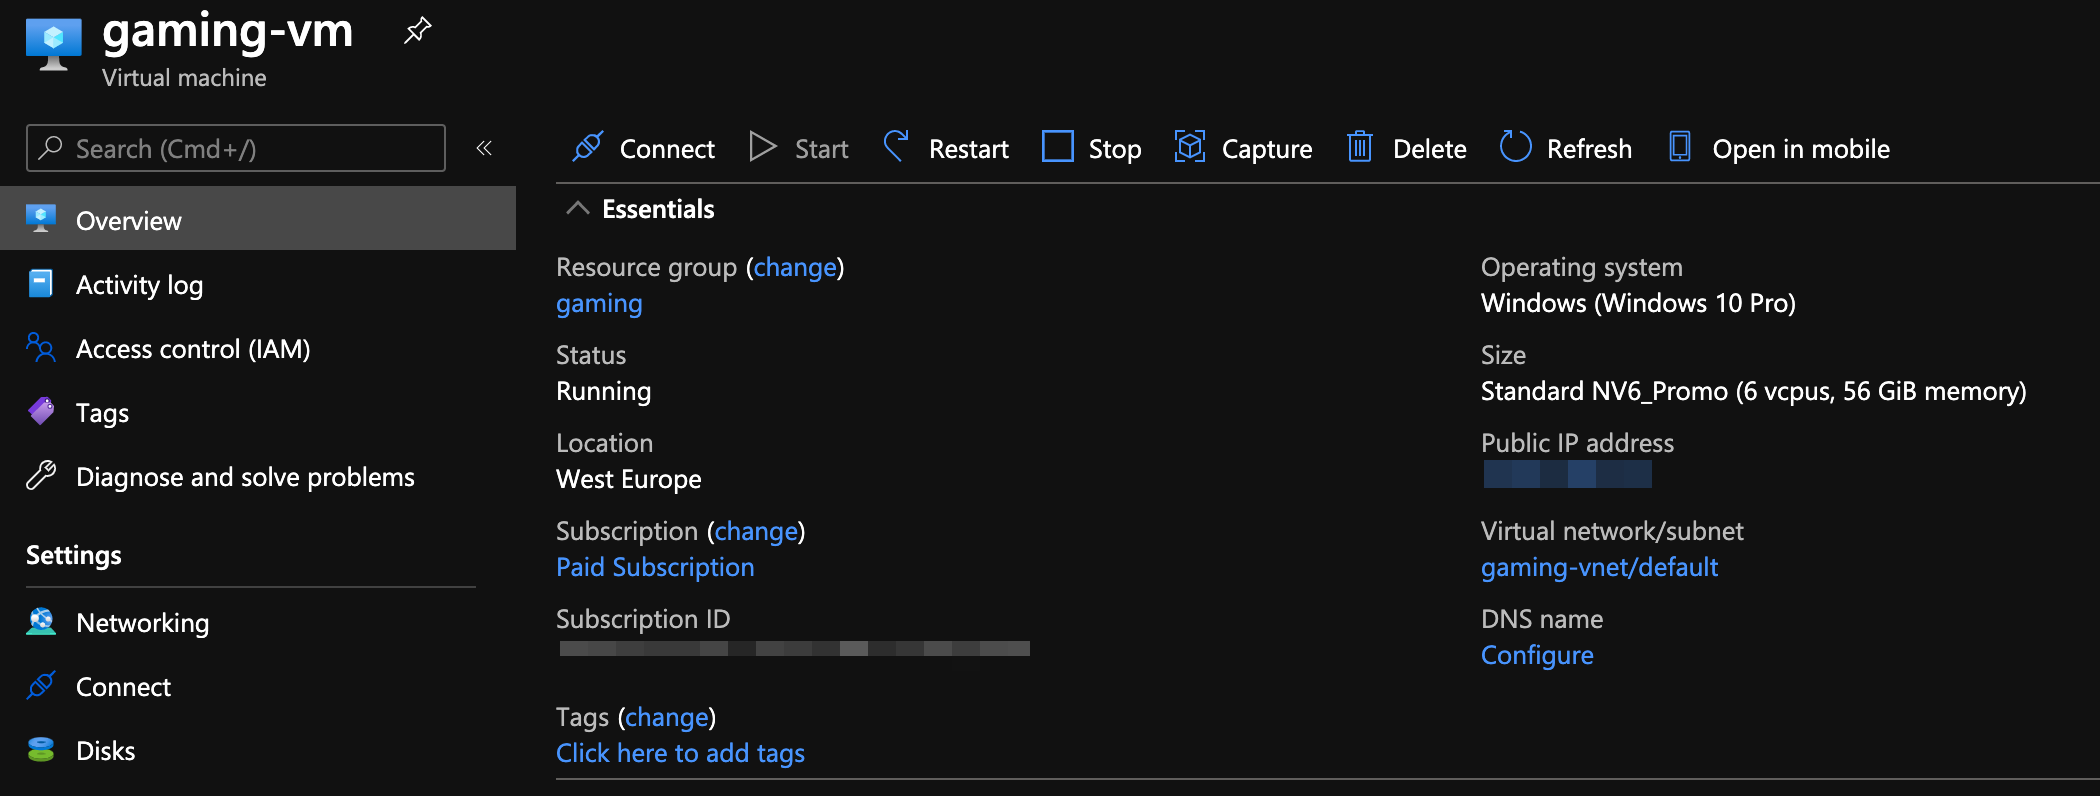
Please use either NV6 or NV6_Promo as size.
Since available sizes depend on the chosen region, it could be necessary to change the region in order to select the necessary size.
Please note, that newer sizes like NV8as_v4 won’t work, because the low-latency remote desktop viewer won’t work with these newer sizes.
The price of NV6_Promo is currently 0.9234€ per hour resp. 504,18€ per month.
At first glance this looks pretty expensive.
Be honest and think of how long you really use the gaming VM.
In my case the costs for the VM will be approx. 10-20€ per year, which sounds pretty good - especially in comparison to the price of a physical gaming computer.
Just don’t forget to turn the VM off if you don’t need it.
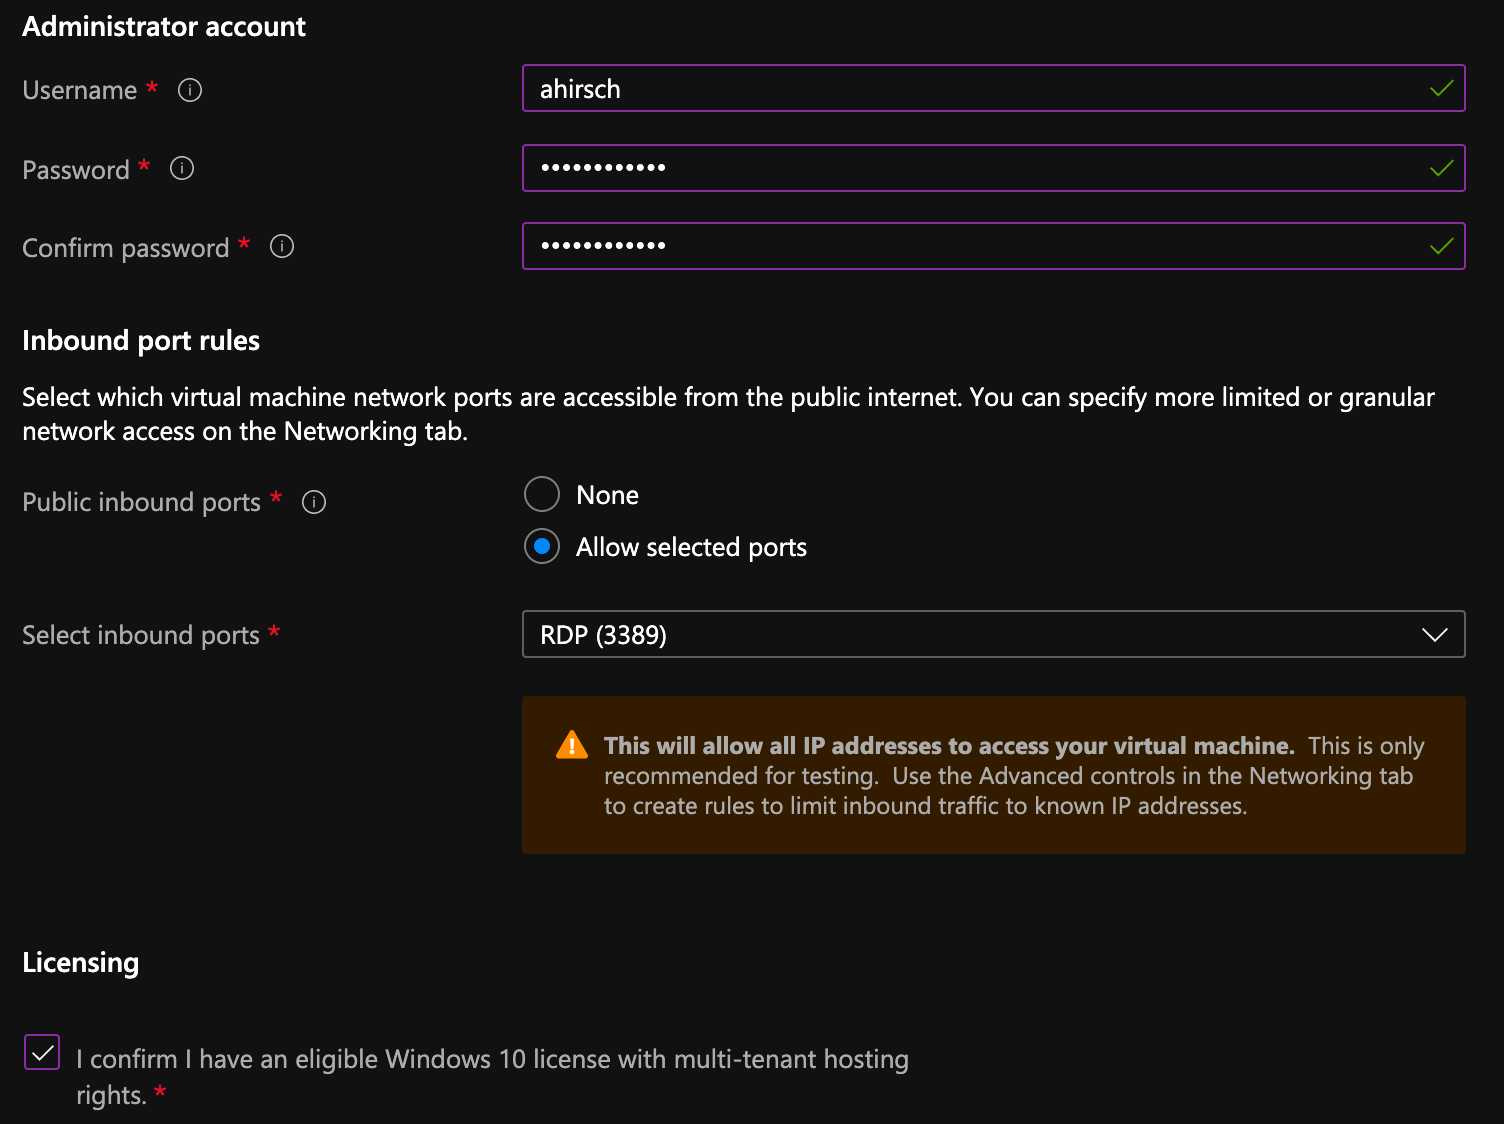
You need to define the username and password to access your VM later.
Please make sure to expose the RDP port 3389 to the internet.
We will need this port to connect to the remote Desktop of the VM.
Then make sure to check that you have a suitable license available and toggle the checkbox accordingly. For further details about the license topic, please have a look at the documentation.
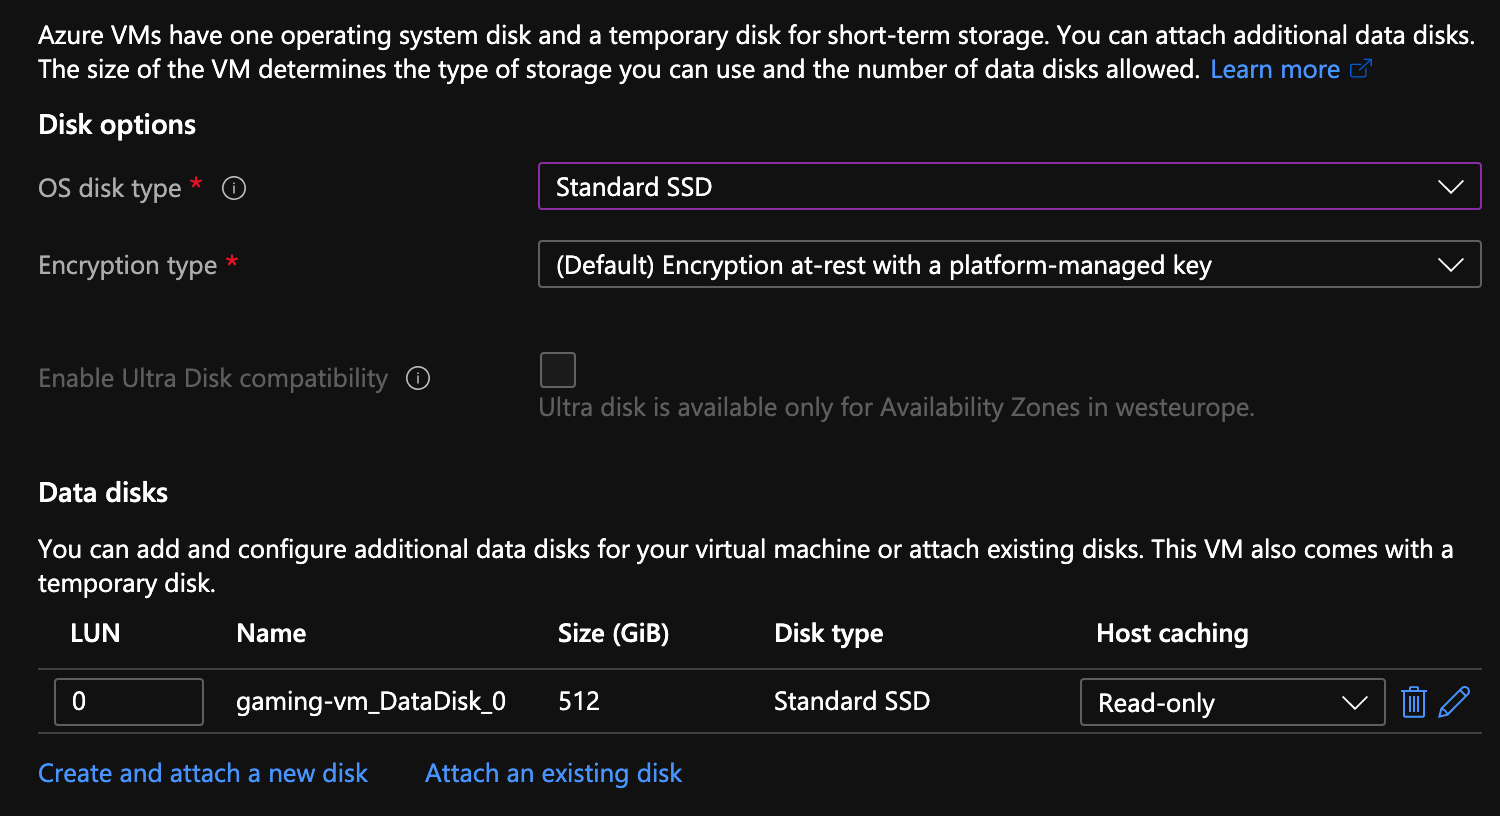
The next step is to configure the storage attached to the VM.
I usually use a Standard SSD for the operating system and another Standard SSD disk with a size of 512 GB for everything I install later (e.g. games).
Feel free to do some other settings or to directly proceed to the last step to keep the default settings. Review the settings again. If everything is fine, you can trigger the creation process.
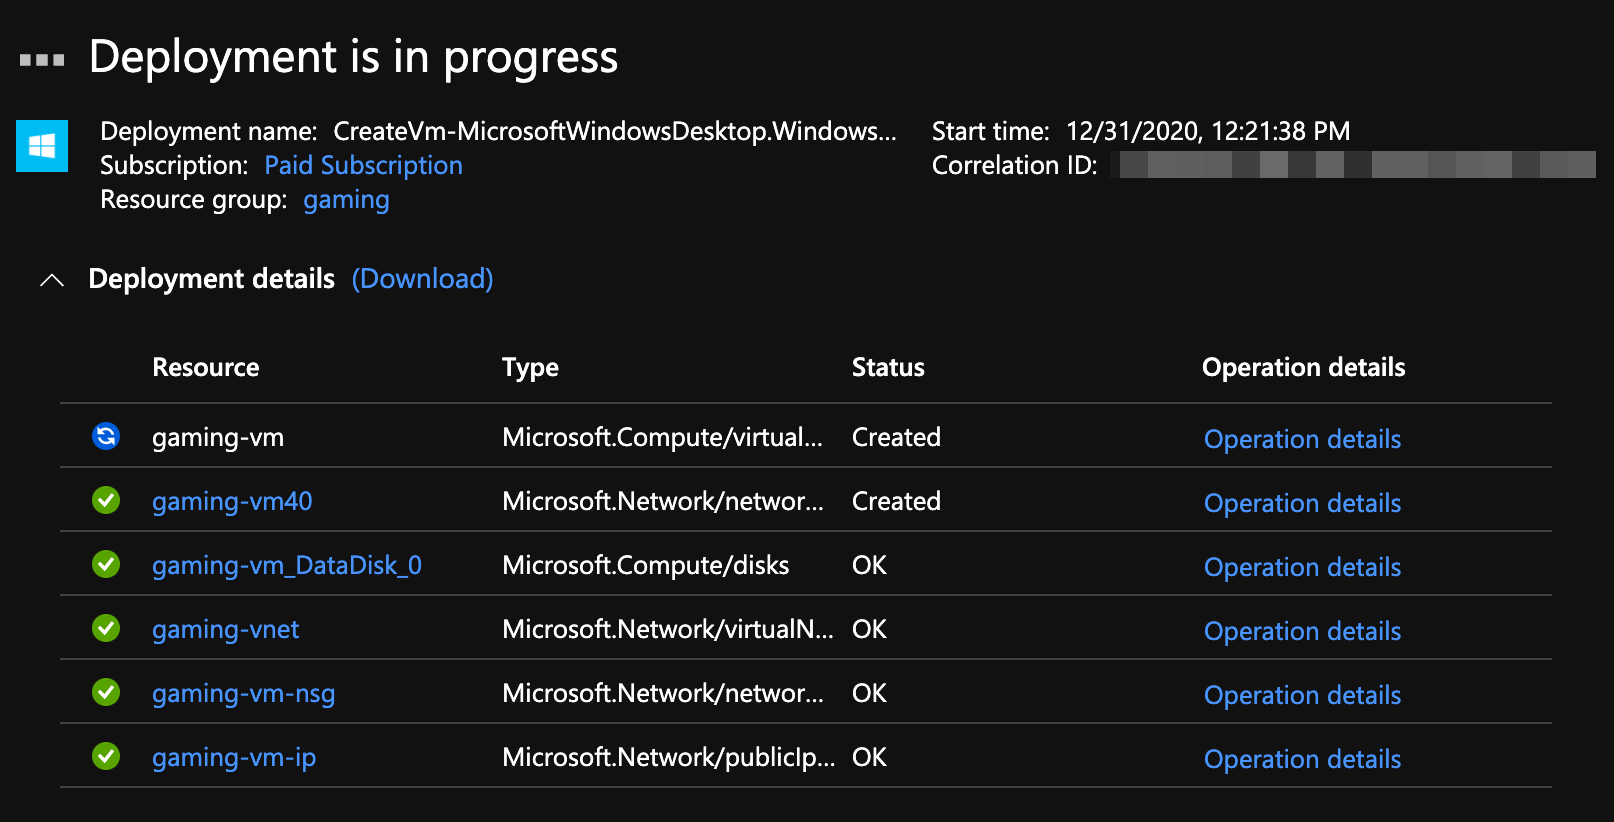
The VM creation process will take some time (usually 2-5 minutes). As you can see in the screenshot, additional resources like a network are created by default.
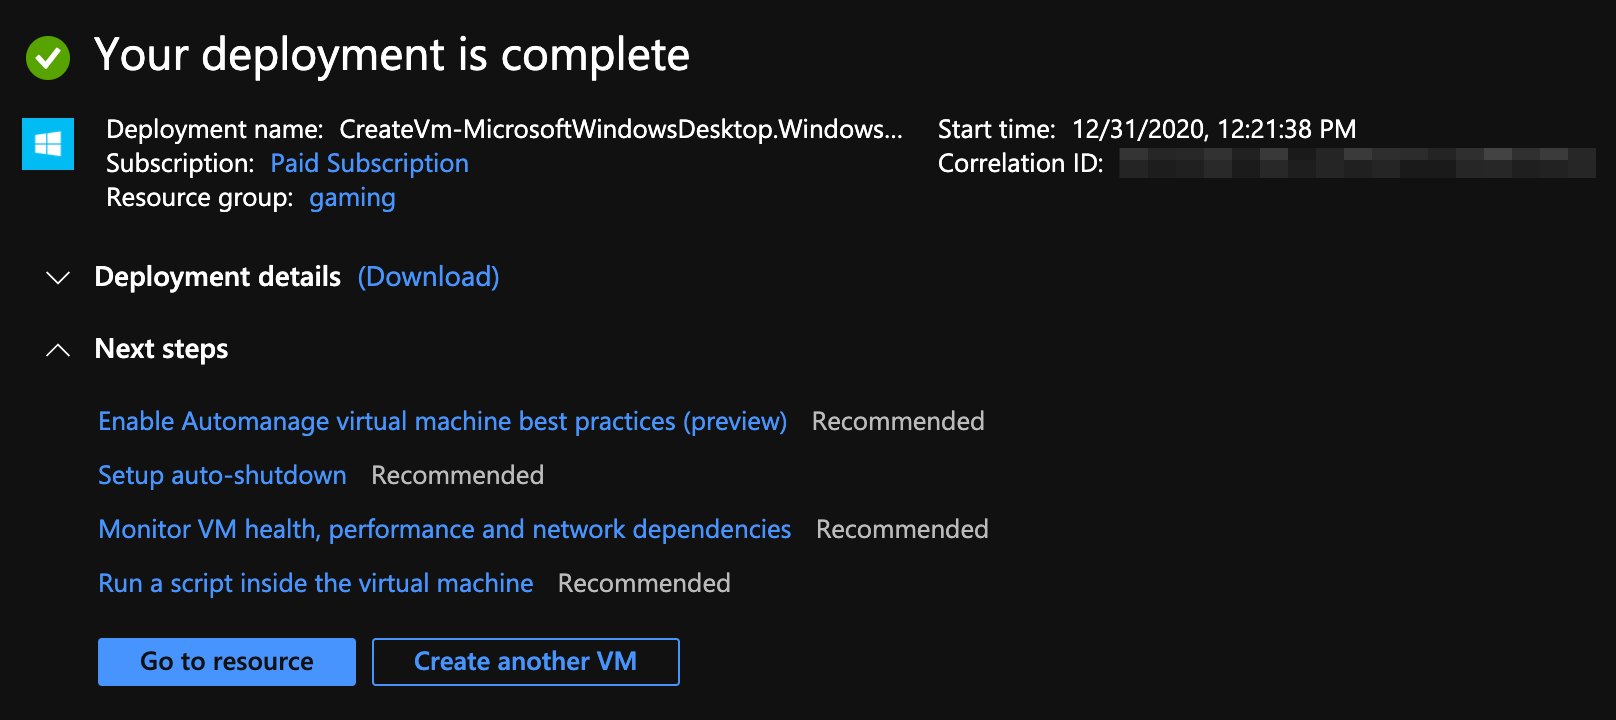
Once the creation process finished, you can go to the previously created VM.
To have the necessary graphics card driver available in the VM, go to the extensions section.
Add the NVIDIA GPU Driver Extension.
As an alternative to the extension approach, you can also install the driver manually from within the VM. I won’t cover this in detail here, but you can find additional information in the documentation.
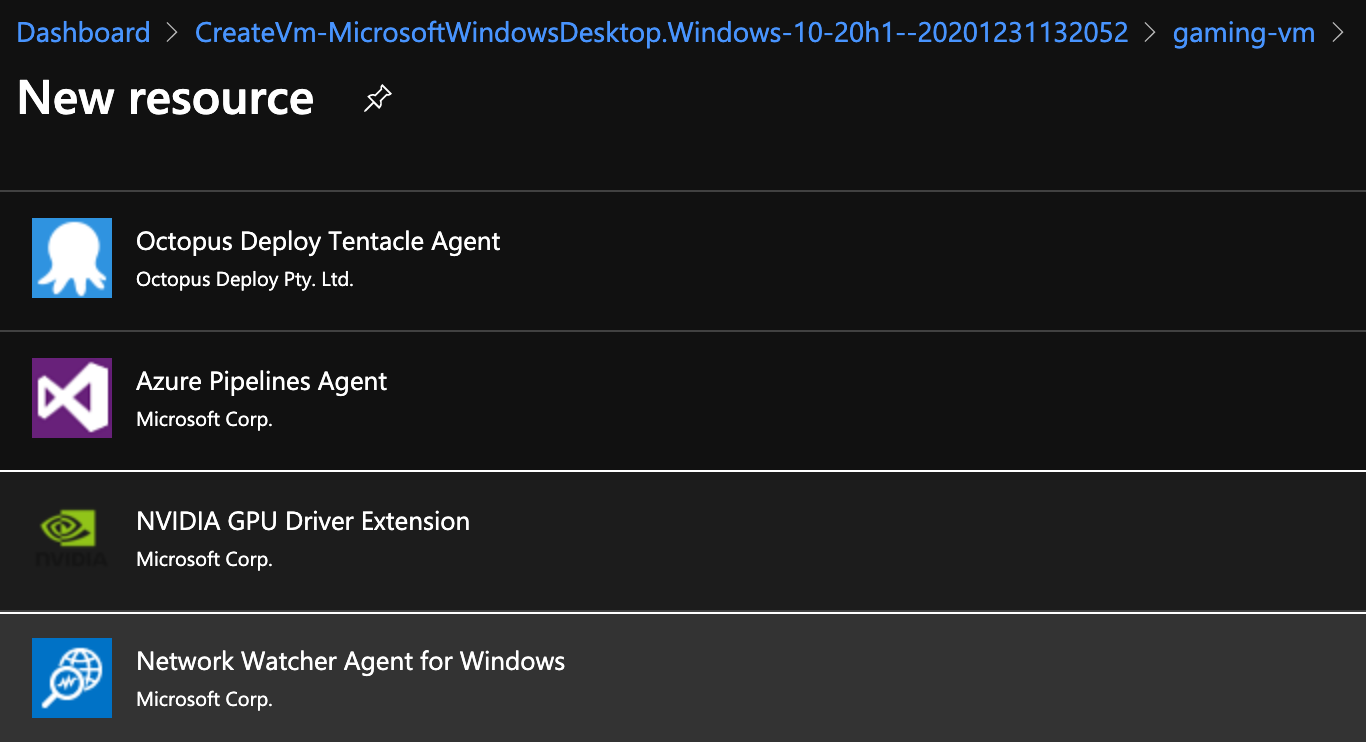
The extension will be provisioned automatically. This could take 1-2 minutes.
Prepare The Operating System
The next step is to configure the VM in a way, that it can be used for gaming.
Click the Connect button in the VM resource overview in the Azure Portal, select RDP, keep the settings as is and download the RDP file.
This RDP file contains the necessary connection details for the remote desktop application.
If the operating system of your laptop is Microsoft Windows, you should be able to directly connect to the VM using this file. In case of Mac OS, you need to install an additional tool like the Microsoft Remote Desktop tool. Once installed, you can open the downloaded file to connect to the VM.
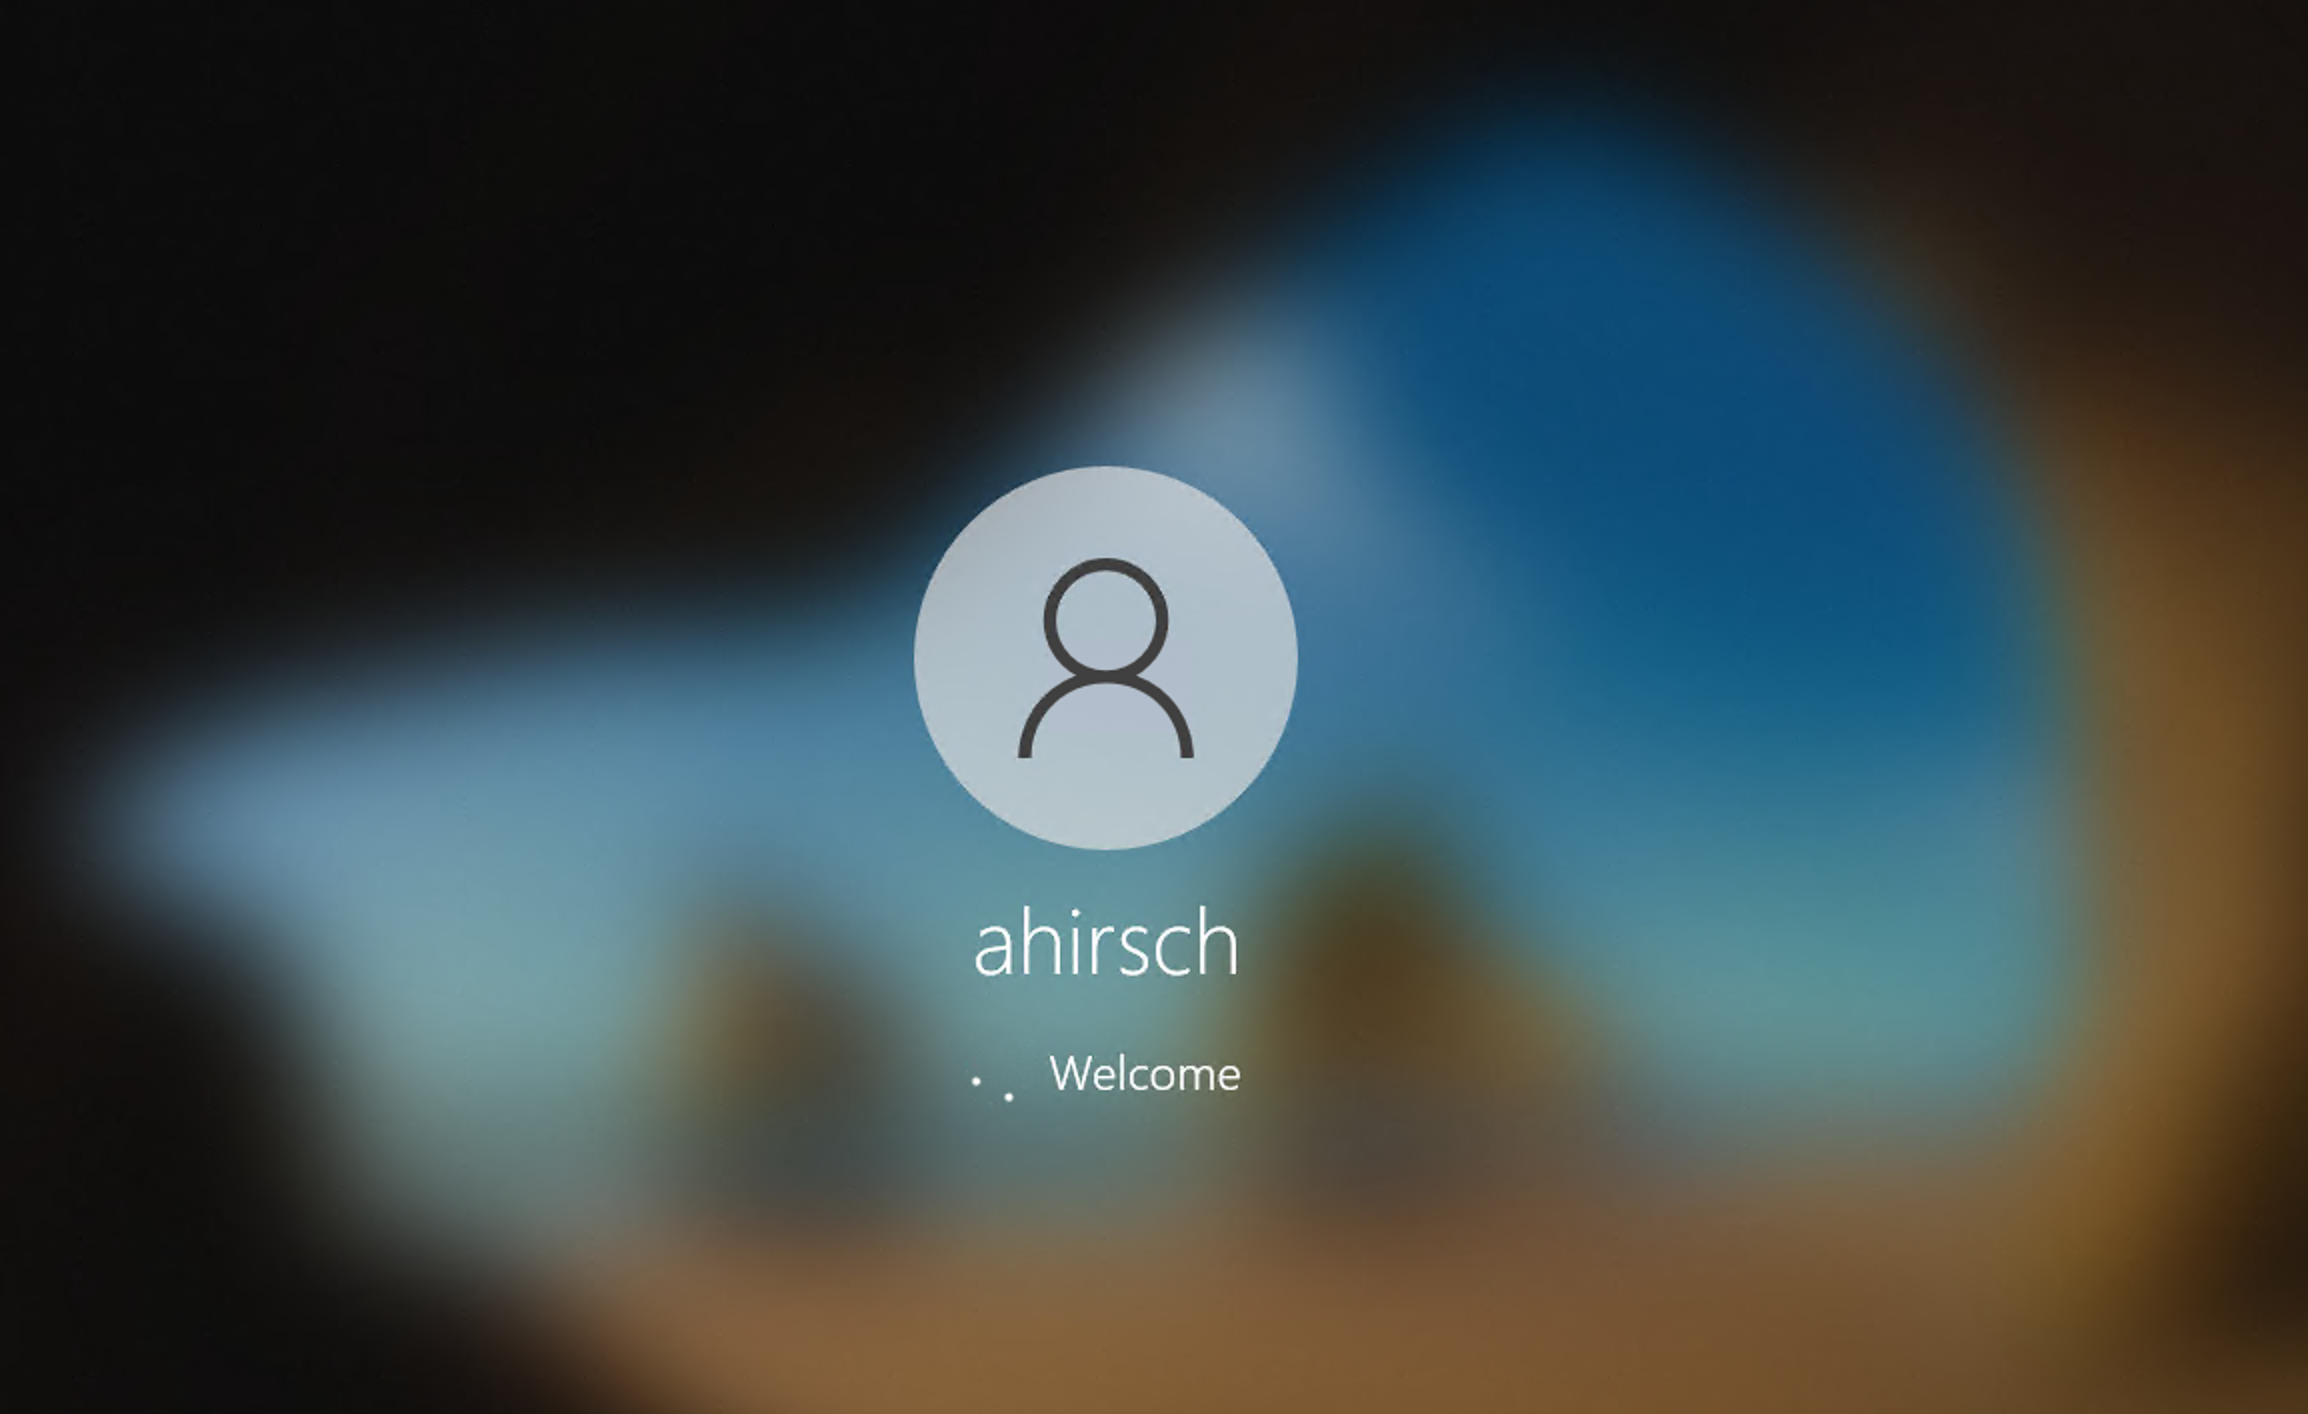
Enter the credentials you defined when creating the VM and accept the certificate.
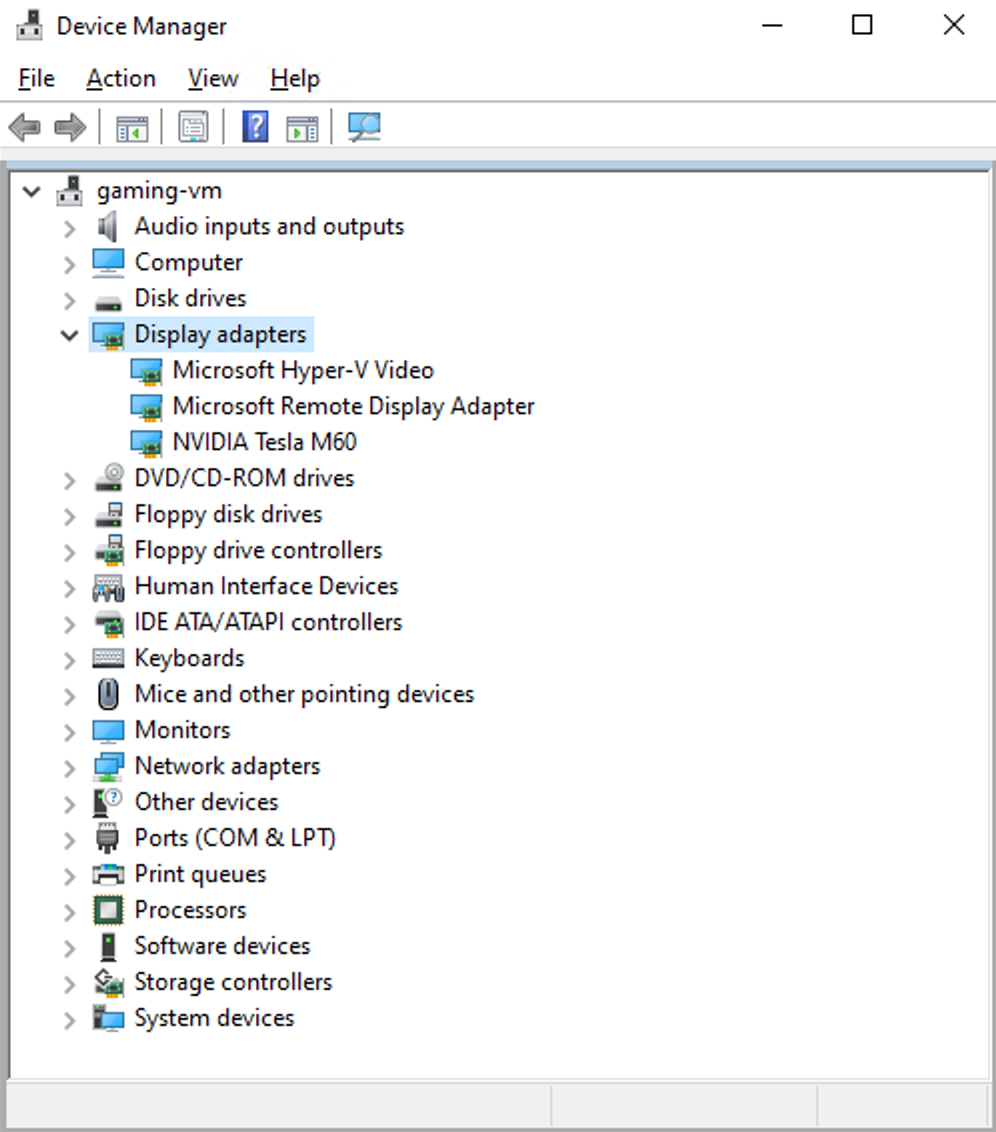
To check whether the driver installation using the extension worked, go to the device manager and make sure, that NVIDIA Tesla M60 is listed under display adapters.
Check for Windows updates and install all of them. This could take some time, but usually you can already proceed with the next steps during the update process.
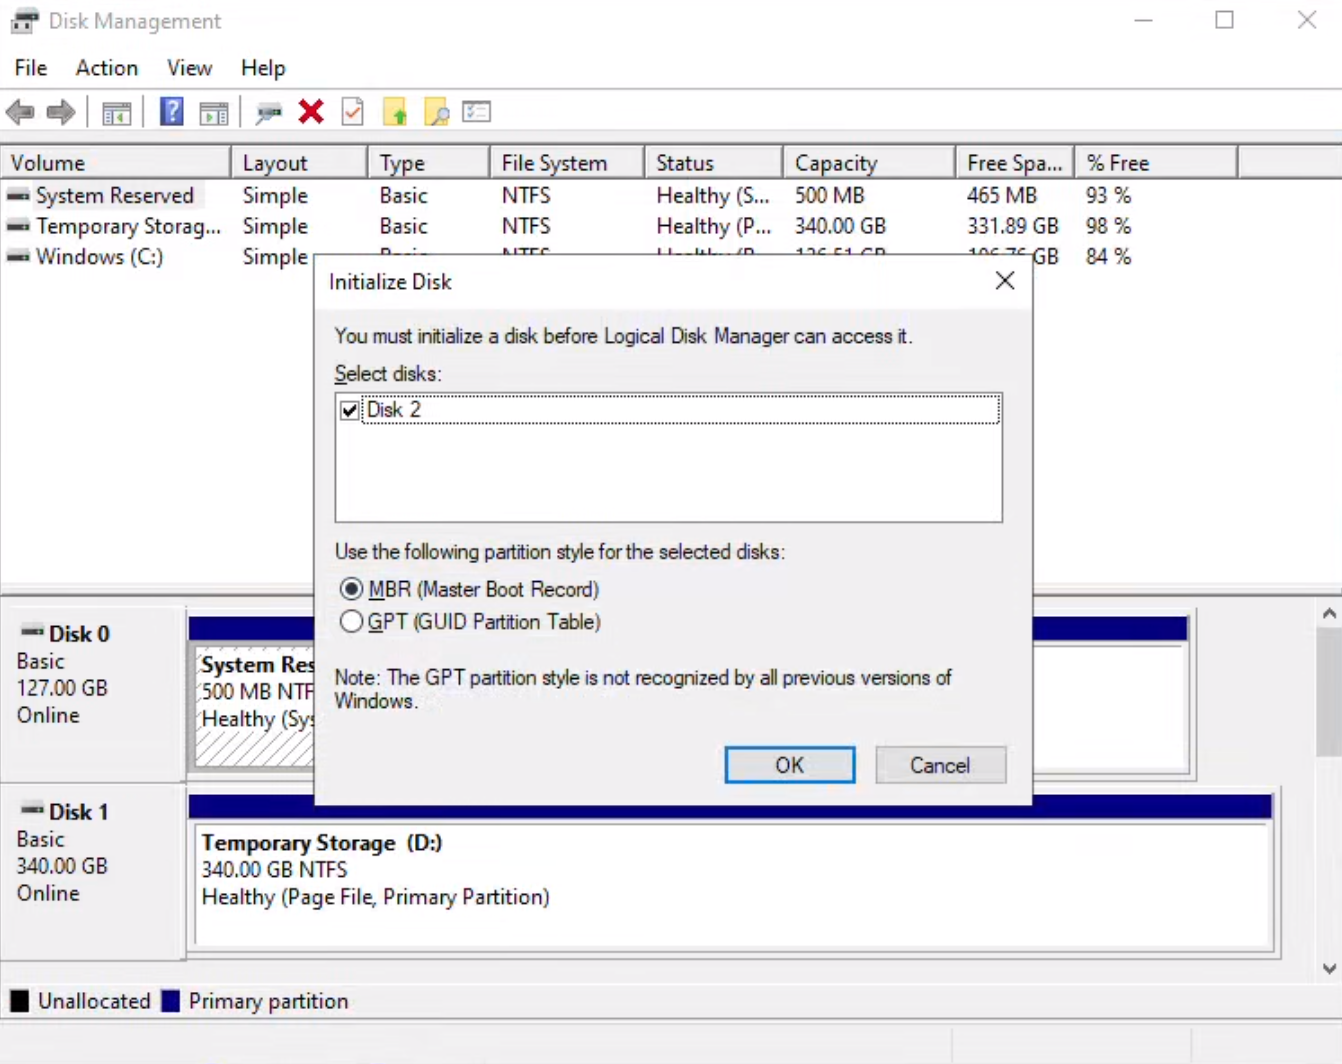
You remember that we attached additional storage to the VM? Now we need to do the setup of this storage. Navigate to the disk management, select the additional storage and initialize it. Once done, the storage should properly appear.
To be able to hear the game sound from the VM on the local laptop, it is necessary to install a specific sound driver. Please download it from the website and install it.
Prepare For Gaming
Please install Parsec in the VM as well as on your laptop. The installer is available on the website. If you don’t have a Parsec account yet, please create one.
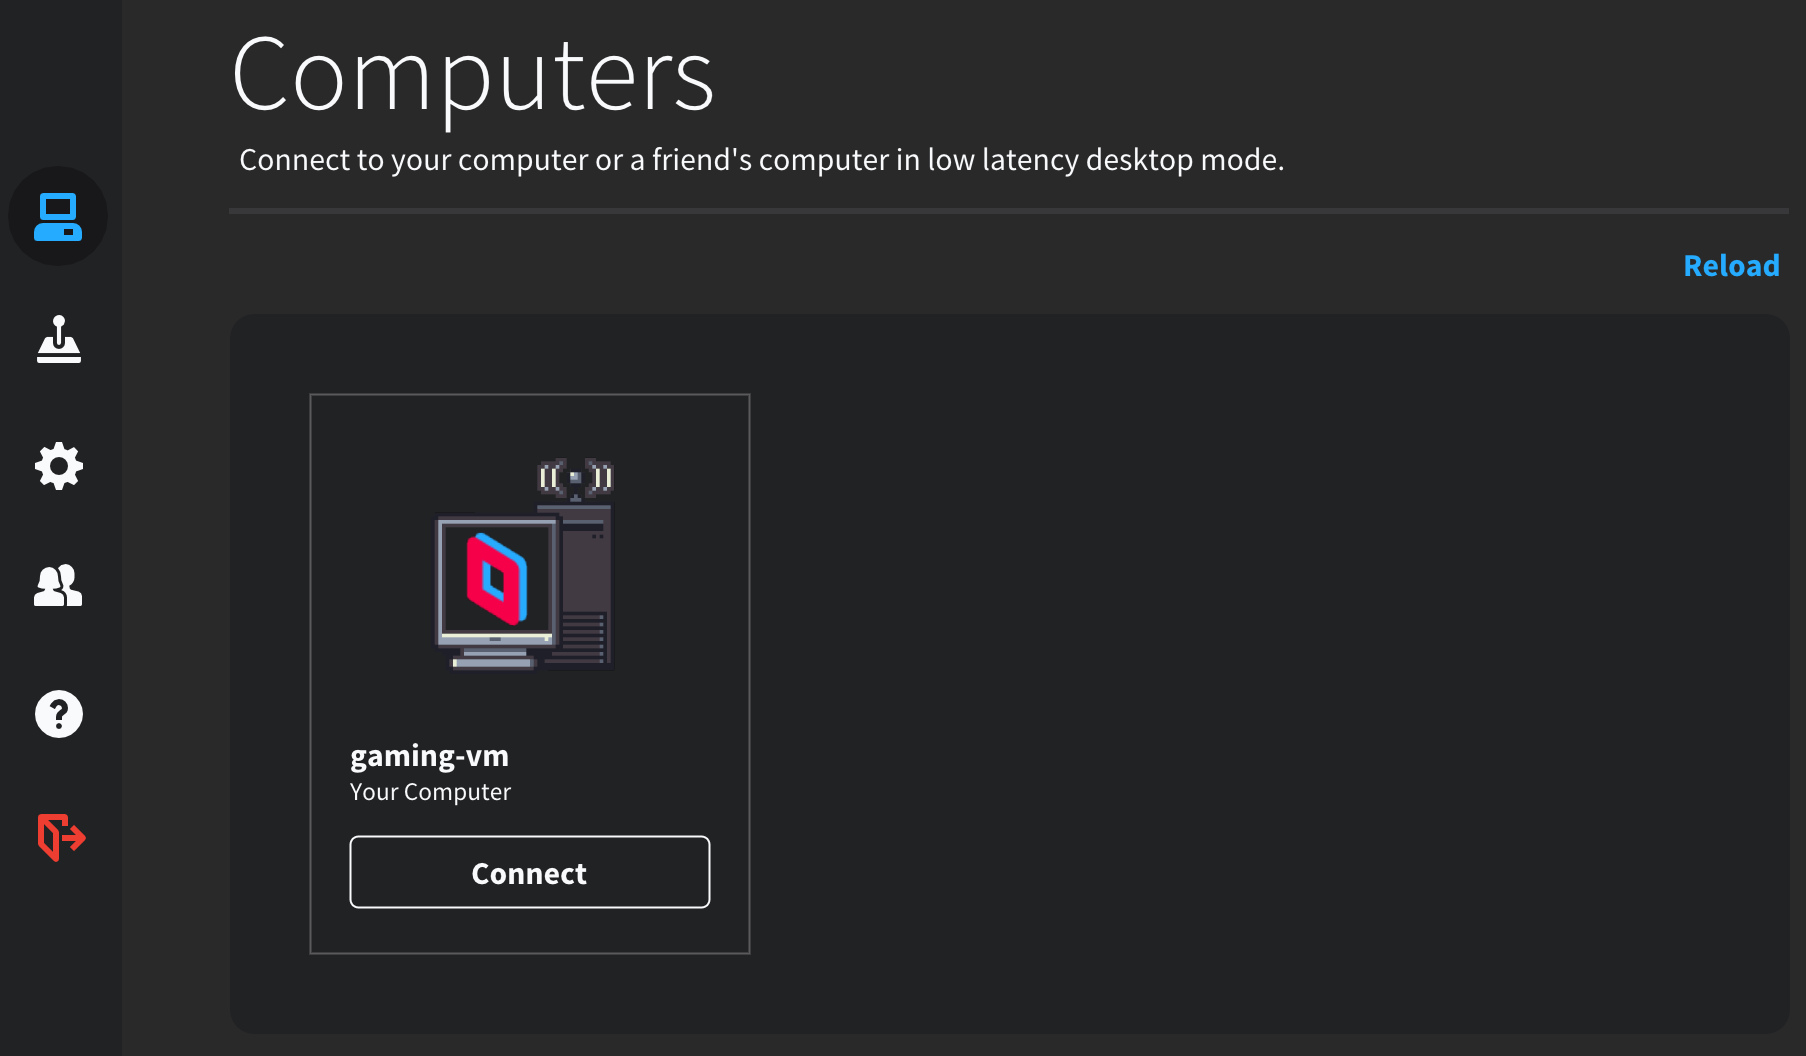
Sign in with your account in the VM as well as on your laptop. Then use Parsec to connect from your Laptop to the VM. If this works, you can close the RDP connection.
From now on, you can use Parsec to access the remote desktop. Please note, that you always have to log in using RDP once the stopped VM started again. Some minutes later, you will be able to connect via Parsec.
Now you are prepared to install and play games etc.
Conclusion
As an alternative to a physical gaming computer, it could be a valid alternative to use a gaming VM hosted in the cloud. It offers full flexibility and allows to use a pay-per-use billing model, which is often much cheaper than buying hardware - but of course you must always turn off the VM, when you don’t need it any more.
To not run in billing issues, you should keep in mind, that the storage capacity also causes costs - of course also during times when the VM itself is turned off. That’s the reason, why I usually destroy all resources once I played enough.
Feel free to adopt the approach presented here and have fun gaming.
2 Comments
Rachid on October 15, 2021
Hi, thank you for the clear instructions on how to setup the gaming pc in Azure. Unfortunately the NV6 and NV6_Promo are no longer available. Is there a updated version of this tutorial? Thanks! Gr, Rachid
Andreas Hirsch on October 18, 2021
Unfortunately there is no updated version available, sorry.
Leave A Comment
I'd love to hear your opinion and experiences. Share your thoughts with a comment below! Please note that comments will appear after moderation.